In my role as the exec editor of the Krrb blog, I’ve been busily posting away about all sorts of things while sadly leaving my own blog to duke it out on it’s own. Aka pretty much ignoring it. But no more! Because I figure the least I can do is to re post some of my favorite pieces here, for you guys to check out.
One post that I have found particularly inspiring in my own life came out of this conversation I had with artist and composting expert Amanda Matles, who laid out in simple english, with awesome drawings to boot, how to do your own compost. Which I’m going to start doing, instead of hauling my food scraps into Union Square to donate them to the Lower East Side composting crew.
It’s long, but really interesting. And we figure if we can get even just a couple of people doing this, the world will be a better place, right? So here it is, reposted in all of it’s glory. Totally worth it.
Composting 101 – Amanda Matles gives us the skinny

Composting expert Amanda Matles spreading the gospel from a Brooklyn rooftop garden. Photo by Brooke Williams.
We’ve all heard about the “virtues” of composting, but if you’re anything like us, the idea of keeping a huge pile of rotting food in a bucket someplace in your kitchen (and if you live in NYC, your kitchen ain’t big!) isn’t all that appealing. And worms, too? No way!
But we do love the idea of a little home garden, and we’re also committed to reducing the pile of stuff we send to the landfill. So we paid a visit to our friend, artist and urban gardener Amanda Matles, who gives composting workshops around NYC at places like Trade School and The Commons. She has also taught investigative design projects about the global flows of food with the Center for Urban Pedagogy, in Brooklyn. Who better to give us the low-down on making this “black gold”?
Check out what she has to say. We were fascinated. And by the end of our conversation, we were sold.
click below for the 411:
The Interview 
Amanda’s awesome composting diagram.
Ok Amanda, tell us the deal.
Paper + potatoes = soil!? Yes. It’s true. Most of your organic waste (non-plastic, non-oily or animal-based) can be mixed with paper or sawdust and left alone for a few months to become great compost. You can add it to your plants or to street trees. Compost adds nutrients that synthetic fertilizers just can’t even compete with, and keeps great soil making material from being lost to the landfills forever.
Sounds good, but what exactly is composting, anyway?
Composting is simply the controlled acceleration of natural decomposition. Everything made of natural material decomposes on its own. Yes, even your leather gloves. So what we’re doing when we compost is speeding up the decomposition process in various ways, and then choosing where we apply the finished material.
How did you first get into it?
When I moved to New York, the combination of a very dense population, small apartment, and the huge amount of trash I generated began to become a real source of trouble for me. I hated knowing that almost everything I threw away went on an expensive journey by barge or train to some landfill in another state. I began to do some community gardening at the same time, and composting was the grand link between the flourishing, amazing, beautiful, healthy food we were growing, and the daily “garbage” I created by living, working and eating. In the garden, nothing goes to waste.
I realized that all this stuff – my food and paper and cardboard- grew out of soil, from a raw state in the first place, so why wasn’t I returning the materials back in to the process when I was finished? It was all pretty magical to see that cycle and transformation right before my eyes, and I have been hooked on composting ever since. I reduced my garbage by about 75% and that was amazing. Plus, it turned out to be really satisfying to shred my junk mail for the compost to help the beautiful flowers on my fire escape to bloom.
Wow. That’s so cool. Is there a difference between compost and just dirt?
Yep. Dirt has all the minerals and structural elements of soil, like sand, silt, and clay that provide air spaces for beneficial soil organisms. Plus, if its healthy, dirt also contains varying levels of decayed biomass necessary to support all life on this planet. Humus, (pronounced hyoo-muhs) or compost, is the dark, organic, biomass part of soil that is a very important component of healthy soil. Humus itself is totally, totally dead. But the tiny decomposers that are present to synthesize materials into nutrient rich fertilizer are at varying levels of aliveness and constantly circulate their own biomass into compost in the process of their short lives.

A red wiggler worm is typically used for composting indoors. Photo by net efekt.
Do you really need worms?
There are two kinds of composting that you can do in the city. Indoor and outdoor. They have differences. Composting indoors does require a special species of ‘red wiggler’ worms, Latin name Eisenia fetida. They eat half their weight in food scraps every day! Usually you have one 1lb of worms per bin. They can process (aka eat, digest, and excrete) 3.5 lbs of food scraps a week! This means that they turn garbage in to compost really fast which is great for small indoor spaces!
You will need a bin to put everything in. The Lower East Side Ecology Center sells all of the things you would need on their website and they even have a composting hotline. They can give you very detailed instructions for setting up your bin, maintaining it and then harvesting the compost when its finished. The ‘red wigglers’ don’t survive in fluctuating temperatures below 50 and above 80, so they are best suited for indoor use only. You don’t really ever have to handle or see the worms if you don’t want to. The bin will always have a ton of paper bedding on top of the action. You really don’t notice them as they work their magic, but they are kind of delicate living things so you do need to make sure they like their environment. If you try to mimic the conditions of a forest floor, where it’s moist, but not soaking wet, it’s dark, there are piles of leaves (browns) on top of the soil everywhere, then you’ll be in good shape and the worms will be happy.
The outdoor version does not require special worms at all. Even on your fire escape you will be surprised to see that regular soil friends, like earthworms, fungi strands, and other friendly, harmless, decomposers will find their way into the compost to help break it down. They are the same little guys you find in your outdoor potted plants after they’ve been out there for a while.
But doesn’t it smell?
It only smells if you let it! Smells happen when the compost gets too wet and stagnant! It’s easy to fix or avoid all together. You want the compost to be the same wetness as a wrung out sponge. “Wrung out sponge-ness” also happens to be the optimum amount of wetness for really fast decomposition. The worms like that kind of environment too and will be very content.
My one big piece of advice here is: Cover food scraps with some ‘browns’ every time! Just sprinkle on top some torn up pieces of junk mail, newspaper, cardboard, sawdust – anything that is dry and carbon rich. Covering the food masks any odors, and it balances out moisture rich food scraps. Remember that even though it’s associated with excrement, finished compost is a very neutral substance. For the outdoor version of composting, turning it speeds up the process and circulates air, but it’s not even necessary.
How long does it take?
If you have a great mix of ‘greens’ and ‘browns’, your compost will be very fast (meaning, you’ll have some compost in about 3 weeks) You can also add things like pine cones, small sticks, and corn cobs to allow air to reach the middle of the compost. This speeds up the process. You can certainly just leave it alone, and not turn it at all. It will still turn into compost, just slower. You might start an outdoor bin in the fall and by the next fall you could have compost. A worm bin is usually ready to harvest after about 2-4 months, when it resembles dark crumbly soil. You can tell when compost is ready when it does not resemble any of the original things you put in it, and it smells like sweet earth.
What kind of things can you put in a composter?
People mostly think of composting their food waste. But in order for those green, nitrogen rich materials to break down properly, the addition of brown carbon rich materials, like paper, dried leaves, or cardboard are really important to add. A lot of people forget to do this but its really crucial and, with all the mail and deliveries we get these days, who doesn’t have a ton of paper products lying around! One thing to avoid is glossy paper and waxy things. This won’t decompose and can harm your worms if you are using them. You should try to have a mixture of about 2 times as much “browns” as “greens”. This helps it go quickly and keeps the moisture levels down.
Here’s a partial list of things you can compost:
“Browns”
Shredded newspaper and brown paper
Eggshells and nutshells
Breads, grains, beans and spices
Paper towels, napkins, plates and cups
Natural packing materials
Rags, lint dust and floor sweepings
Cotton balls and q-tips
Hand wipes and tissues
Wooden skewers, chopsticks, popsicle sticks, match sticks
Fall leaves
Spent plants, straw and hay, dried flowers
Pine needles
Small twigs and wood chips
Sawdust
“Greens”
Fruit and vegetable scraps
Coffee grounds and filters, tea and teabags
Spoiled juice
Fresh leaves (green leaves)
Green plants, weeds without seeds
Pruning and hedge trimmings
Grass clippings
Seaweed
Aquarium water and algae
Horse manure
Small pet manure, bedding (as long as they’re vegetarian pets)
Feathers
Animal and human hair and nail clippings
Brewery waste, hops and pomace
Things to avoid
Meat
Fish scraps
Fats, oils and grease
Invasive weeds (kudzu, jimsonweed, mugwort if they present seeds)
Diseased plants (most piles will not kill the disease pathogen and it spreads)
Dairy products (they spoil)
Dog and cat waste (because they are not vegetarians)
Colored or glossy paper (contains plastic)
Pressure treated lumber (toxic)
Pesticide treated plants
Large branches (won’t break down very fast)

The finished product! Photo by Annie Norman.
What do we do with the stuff once it’s composted?
Compost in soil is continually taken up by plants and so compost must be periodically added to the soil to make it fertile and healthy. Once you have compost you can add it to your house plants and garden plants by adding 1-2″ to a pot and scratching it into the top 1-2″ of existing soil. You can do this every few months. You can also use some unfinished compost to mulch around your plants, or around street trees to help them retain water in dry seasons. You can steep compost in water for a few hours, dilute it 10:1 and spray it on the leaves of trees and plants as a natural pest protection. You can help remediate bad soil in your neighborhood by adding compost to it wherever you see dirt with not much growing in it. This helps begin the process of neutralizing and fertilizing the dirt and making it easier to support life. Compost is such a great fertilizer because it is naturally very balanced and plants can easily take up whatever they need from it, rather than the high doses of nutrients in commercial fertilizers that burn and stress plants. You can also give it to friends – it’s a great gift!
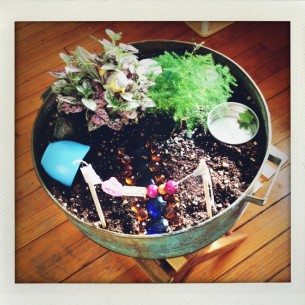
Any good small scale models you can recommend for use indoors or on a fire escape?
Its important in the city to get a container that circulates air and is rodent proof.
The three best outdoor models I can recommend are: The Garden Gourmet Compost Bin is $61. This one is awesome if you don’t want to touch anything! This one sorts the compost automatically because it is a series of 5 trays stacked on top of each other. You put the scraps on top and the finished compost comes out the bottom! Assembled it is about 36″x 24″x 24″. I love this one.

The Garden Gourmet compost bin!
A stainless steel container and tight fitting lid that has a bunch of holes drilled in it. You can make this yourself if you are a handy type person, or you can buy this from the LES Ecology center for about $23. This one would require you to sift the compost from the bottom, or use the whole container at once. I’d recommend getting two, so you can sort it and get to the finished compost.

This one is easly to make yourself, though it might be hard to make the pretty patterns…
There are larger, round, tumbling ones that are really easy to use, better for a small backyard. Those are about $250 and you have to assemble them yourself, but they make the turning of compost easy. These are abundantly available online – I like the Back Porch Compost Tumbler.

The Back Porch Compost Tumbler.
For indoors, I really recommend buying a plastic “worm condo” bin from the Lower East Side Ecology Center. If you live in NYC, you can pick it up at the Union Square Green Market and its all ready to go. It has a tight fitting lid and screened ventilation.

A condo for worms? Sign us up!
The New York, Brooklyn, Queens, and Staten Island botanical gardens have many excellent composting resources. Also check out nyccompost.org for more information.
This is awesome, Amanda. Thanks so much!
Want to hear more? Read this Trade School blog detailing one of Amanda’s classes. There’s a composting pdf there for downloading, too. You can also check out Amanda’s project (called “Chew on This”) on global food systems and New York City at the Center for Urban Pedagogy.

Comments (0)