98 articles

cooking class: chips ahoy

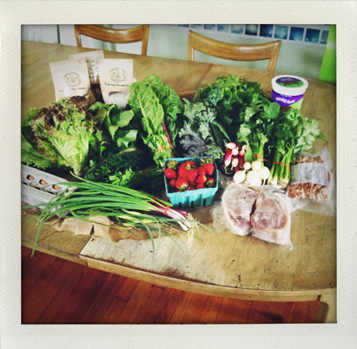
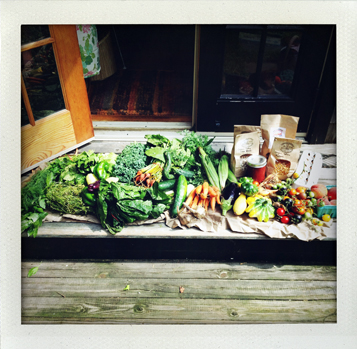
Please find pictured above the insane amount of produce and other sundries  that we recieved this past week from our friend Farmer Totman. Plus I forgot to include the huge hunk of pork and the yogurt, both of which are keeping themselves cool in the freezer and fridge, respectively.

Clearly I need to have more kids.

But as I don’t see that happening any time soon, I guess I’ll just need to get over my inherent laziness and get creative with this abundance.

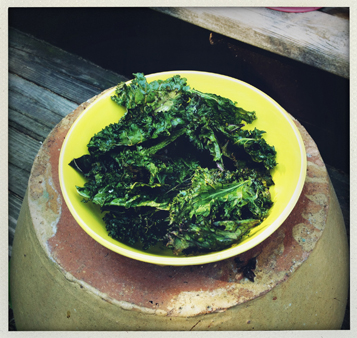
Enter the kale chip. Brilliant in it’s simplicity, in how quickly huge quantities of kale-in-this-form  are inhaled, and in it’s appeal to even a finicky preschooler who claims that she does not, nor ever will, like kale.

Don’t they look delicious?

recipe, etc, follow if you click below…

It’s really quite simple. And here I must credit Deb of Smitten Kitchen fame for jogging my memory.

Just cut the stems and any other rough parts out, and cut the remaining leaves into managable sized pieces. I leave it up to you to decide what “managable” means. Then dump them all into a big bowl, toss with some olive oil and  a few healthy shakes of salt. You can also add a splash of apple cider vinegar here, if you’re looking for a bit of that flavor in your chip. Then spread the coated kale pieces onto a cookie sheet in a single layer, put them in the oven at 300 degrees and bring ‘em out when they are crispy (about 12 minutes or so, depending on your oven.)

They will be gone before you know it.

cooking class: the farmer returns

For the uninitiated, a CSA (Community Supported Agriculture) is a group of like minded folks who pony up a chunk of cash at the beginning of a growing season in order to support one farm. In return for the financial stability, the farmer then delivers the bounty from his harvest to those same people on a weekly basis for as long as it lasts. Some CSA’s have their members go to a central spot to pick up their goodies. We are extremely fortunate to have our deliciousness delivered right to our door.

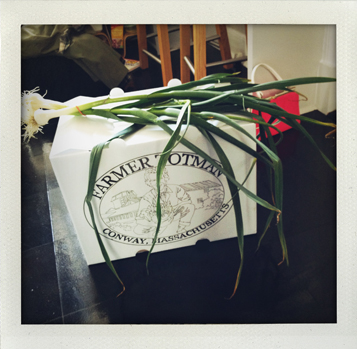
Oh happy is the day when our first Farmer Totman box arrives! Starting the first week of June and continuing on, more or less without cease, through Thanksgiving, the weekely arrival of fresh produce, eggs, meat, grains and other goodies signals the end of my dependence on Whole Foods in particualr and, more importantly, the end of my horribly disorganized style of grocery shopping. At least until the dark days of winter come again, and the deliveries stop for another season, we eat what’s in the box.

Farmer Totman is the current incarnation of the esteemed fashion designer Christopher Totman, who I met and instantly befreinded back in the olden days of the 1990′s. (I still wear something of his probably once a week, which speaks to both the quality of the workmanship as well as the design…) One of the truly wise ones, he ditched the mean streets of NYC for the more pastoral venue of his family farm in Western Massachusetts, turning his artistic eye from shaping dresses to creating crops.

And beautiful crops they are. Lucky are the 24-odd families who receive the fruits of Farmer Totman and his carefully curated posse’s labor. Because the box includes not only the produce that he grows himself, but also goodies from other local small producers in the area… including South River Miso and Side Hill Farm yogurt, which is hands down the best I’ve ever tasted.

But it can be almost oppressive. How do you go through such bounty and use it all up each week before the next week’s delivery arrives? What if, god forbid, we go away for a weekend or dine out more than once in a week? Or if we’re just feeling lazy?

No time for any of that. It’s all about taking what’s in the box and making the best out of it. And the best is pretty damned good, if you ask me. This summer and fall are going to be all about working through the entire box, and sharing some of the great tips/recepies, etc I learn along the way.

Click below for the first installment of this particular story.

So for example, here’s a photo of what showed up a couple of weeks ago…

Yum.

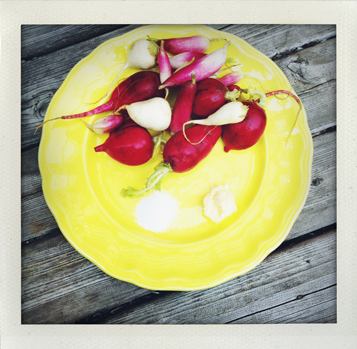
Just looking at it all makes me hungry. So I decided to rip off one of the appetizers at Prune, a favorite spot to eat, especially when you’re stuck in Manhattan. Just clean the radishes, dip them in some softened butter, dip that in some salt and enjoy.

When you start off with the perfect radish, you don’t have to do much!

library day – pretend soup

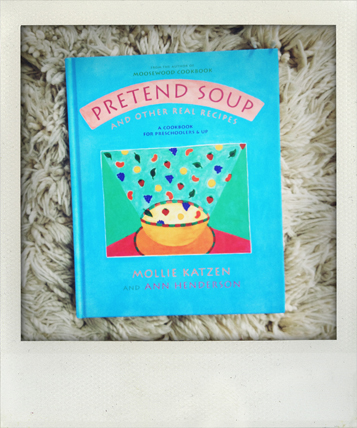
We have had our daughter helping us out in the kitchen since she could reach the counter with the aid of a step stool, but it is only after I spotted this brilliant cookbook at our school book fair that she could really take the reigns and make deliciousness happen on her own (with a few minor assists!)

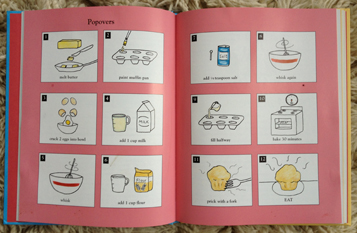
Thank you, oh Mollie Katzen (of the classic Moosewood Cookbook fame) for getting help from co-author Ann Henderson and writing a cookbook for the little ones that a) has the most brilliant illustrated instructions so that they don’t need to be fluent readers and b) has real food recipes made from wholesome ingredients that will hopefully inspire our kids to eat right, rather than just piling whipped cream on top of everything, all the time.

The recipes are first printed traditionally, with little tips for the grown ups about how to tailor the experience for the children. And then, the following two page spread is the illustrated version for the kids, with the last instruction always being “EAT!”

Which we did. And well, too.

Ice cream sandwich as anti depressant

Last weekend was a rough one. Trying to come to terms with losing my uncle to lung cancer sucked (and is ongoing), plus I learned that another friend was also taken by the same beast (though a slightly different version.) And now Maurice Sendak. It’s almost more than I can take.

It was only at the end of the aforementioned weekend that I realized  I’d spent the majority of my time in the kitchen, drowning my sorrows by cooking food. And I must say that the homemade ice cream sandwiches that my daughter and I produced on Sunday afternoon did nudge me towards the realization that the world is still a beautiful place, despite the just plain horrible things that can happen at times. Our sandwiches were far from perfect looking, but man were they delicious.

I have  the fabulous Deb of Smitten Kitchen fame to thank for the idea. Probably my favorite food blogger, her recipes never disappoint. In fact, I’ll probably pre order a copy of her soon-to-be-published cookbook by the time you all are reading this post. which I’m looking forward to as I am not a fan of cooking from a computer screen, but I feel guilty about paper-wasting if I print out the recipes.

A few tips, if you decide to go for these sandwiches yourselves (and you most definitely should):

Take all of the helpful hints in the recipe to heart. They actually malke the whole thing much more managable.

Give the newly made and wrapped sandwiches ample time to freeze back up before you serve them. We did not (maybe 30 minutes or so) and the ice cream was a bit too soft in the center. Not that it mattered, especially as we ate them outside, but if you don’t want your floor to turn into lakes of vanilla, I’d take this advice seriously.

Click below for the full recipe, or for all the details, tons of beautiful photos and a doorway into the most excellent world of Smitten Kitchen, click here. And tell her I sent you.

Classic Ice Cream Sandwiches from Smitten Kitchen
Adapted from Sweet Designs by Amy Atlas

Yield: 12 2-by-4-by-1-inch ice cream sandwiches (24 cookies). However, I made 10 large and 10 miniature (1-by-1.5-inch) sandwiches because while I was baking the large ones, my son toddled in from his nap and announced “Mommy making cookies! For Jacob!” and I realized he probably didn’t need a cookie nearly the size of his head. I am so very mean.

If you have a favorite cookie cutter shape you’d like to use for these sandwiches, definitely use it. You can cut the cookies and the ice cream with it. You could perhaps even make, say, star-shaped ice cream sandwiches for a 4th of July-themed cookout. You know, if you’re not me.

Re, the cocoa weight below: Just about everyone on earth besides me finds that a cup of unsweetened cocoa powder weighs 80 to 85 grams. That’s what the number below is based on. However, I consistently find that my super-fancy Valrhona Dutch cocoa weighs in a bit higher, up to 5 to 10 grams more than you see below. So, you might nudge it up if you’re using the same.

Cookies
2 2/3 cups (335 grams) all-purpose flour
2/3 cup plus 1/4 cup (75 grams) extra dark or Dutch-processed unsweetened cocoa powder
1 1/4 cups (2 1/2 sticks or 285 grams) unsalted butter, softened
1 cup (200 grams) granulated sugar
3/4 teaspoon table salt
2 large egg yolks
1 tablespoon vanilla extract

Filling
1/2 gallon (8 cups or approximately 1050 grams, weight will vary by brand/variety) ice cream, your choice of flavor (I used cookies and cream), softened

Preheat oven to 350°F degrees. Line two baking sheets with parchment paper. Sift the flour and cocoa together (I am generally too lazy to sift things but cocoa is really lumpy so don’t skip this) and set aside. In the bowl of a standing mixer with a paddle attachment, beat the butter, sugar, and salt together until light and fluffy. Add the yolks and vanilla and mix until combined, then scrape down sides and mix briefly again. Add the flour mixture a little at a time then mix until combined.

Transfer the dough to a lightly floured work surface and divide into two equal pieces. If the dough is too soft to handle, wrap and chill it until firm enough to roll out (I recommend 30 minutes only; any longer and it becomes crumbly to roll out). Roll each batch into a 1/4-inch thick rectangle, about 10 by 8 inches. Cut into a total of 24 2-by-4-inch rectangles.

Use an offset spatula to transfer the rectangles to the prepared sheets; you’ll only need an inch space between them. Use the tip of a thermometer (totally brilliant tip from Amy, by the way; it made far better indentations than skewers that I usually use for docking) to poke the cookies with holes (Amy recommends 14 holes but I used this as my guide and made more).

Bake the cookies for 16 to 18 minutes, or until they stay firm when tapped in the center. Transfer to a wire rack to cool completely. Repeat with remaining cookie dough, rerolling scraps as needed.

Meanwhile, line the bottom of a 9-by-13-inch pan with parchment paper, allowing it to overhang on two sides (it will act as a sling for the ice cream). Spread the softened ice cream into the pan, smooth the top and freeze until firm, about one hour (or longer if your freezer is as terrible as mine).

Run a knife along the exposed sides of the pan to loosen the ice cream. Holding onto the parchment paper, lift ice cream out of the pan and onto the work surface. Using one of the cookies as a template, cut ice cream into 12 2-by-4-inch bars. Strangely, I found using kitchen shears to go right through the ice cream and the paper underneath the easiest. I then flipped each piece of ice cream onto a cookie, peeled off the paper, and finished sandwiching the rectangle of ice cream with a second cookie.

(Look, I’d be lying if I didn’t tell you that this whole ice cream part caused a spectacular mess in my kitchen. Huge! It was an ice cream massacre! But, I was rushing and you should not. If your ice cream begins to soften, just slide it back into the freezer for a bit and it will become easy to work with again. Promise. Do as I say, not as I did, unless you like sticky floors.)

Wrap each ice cream sandwich in plastic and please, again, listen to Amy here. I was all “Oh, let me just get them cold again and I’ll wrap them later.” Which was wrong. They continue to lose their shape for a bit, runny and melting, before they freeze up and that is why my sandwiches were kind of a mess. “Sealing” them into their shape immediately with plastic is, well, the reason that Amy is a sweets stylist and my food looks, uh, “handmade.”

Freeze until just before serving.
you’ve tried all the rest…

These people actually are not lying. The pizza at Best Pizza is arguably the best pizza I’ve had in quite some time. And I eat pizza city-wide. Brick oven. Thin crust. Real tomato sauce. Fresh toppings. Granted, I’ve been worn down by lots of last minute what-are-we-having-for-dinner moments at slightly less than optimal joints, but still.

This place rocks. And they play kind of serious Wu Tang style hip hop, which I at once love (because I love it) and hate (because I’m still trying to shelter my pre schooler from straight up swearing and glorification of violence… wish me luck.) It’s never too crowded, and it’s on our way home from school, which for me might be it’s biggest selling point.

Best Pizza can be found at 33 Havemeyer Street (between N8 and N7 in Williamsburg, Brooklyn.

They even have a blog: http://bestpizza.tumblr.com/

Mushroom bread

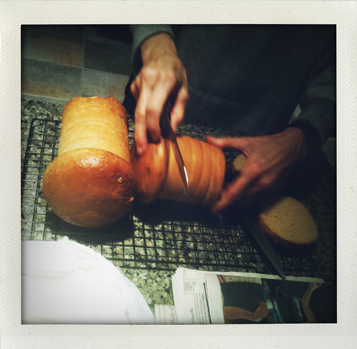
On a recent trip to Portland, OR, my aunt treated us with this amazing bread recipe. Called mushroom bread, it’s basically a delicious loaf of bread that is cooked in a one pound coffee can and emerges looking like a mushroom.

The recipe, evidently, comes via my Aunt’s mother, who had a subscription to Sunset Magazine over 40 years ago, and deemed this one worth saving. It’s really easy… after you mix the dough, you stick it in a coffee can, wait for it to rise (and pop the top off!), and then bake.

And let me just say for the record, that I am very glad my aunt has kept so many of her old recipes, because this one rocks.

Click below for details…

Here’s how you will make this bread. Which you will. It’salso fun for kids to watch the dough rise inside the unorthodox pan…

Mushroom Bread – from AJ’s 44 year old recipe file

1 pkg. Yeast
1/2 Cup warm water
1/8 tsp powdered ginger
3 TB sugar, divided

1 tsp salt
1- 12oz can Evaporated Milk
3 TB oil
4 to 4 1/2 Cups flour

Two – 1 pound coffee cans with plastic lids. Butter insides of cans and lids.

Dissolve yeast in warm water in large bowl, then stir in ginger and 1 TB sugar and let stand in warm place until foamy on top (about 15 min.). Stir in remaining sugar, salt, milk and oil. Then gradually add flour with a wooden spoon. Blend well. Dough will be heavy and sticky. Divide in half between the two coffee cans. Put on lids. Let stand in warm place and let dough rise until lids pop off (about 1 hour or more).

Preheat oven to 350 degrees. Place cans on lower shelf and bake uncovered for 45 minutes or until deep golden brown.

Remove from oven and brush “mushroom” tops with butter. Let stand for 5 to 10 minutes, then take knife and run around edge of cans to remove bread. Or just try to tap and shake bread out.

Cool on rack if you can stand to wait! Makes excellent toast.

sweet and sour chicken

I have been meaning to put this recipe up for ages and am finally getting to it– just when everybody else (of course) is serving up ideas for summertime cooking outdoors…

Whatever. There is always a place for the quick and easy dinner plan. Especially for those of us with tiny hungry picky mouths to feed. And when it stars the lowly and inexpensive chicken thigh (my favorite part of the chicken, with it’s sweet dark meat, is actually far more nutrient laden than the ubiquitous breast) it’s a no brainer.

I discovered this recipe while scanning the magazine racks of Whole Foods in desperation, looking for something, anything, to help pass the time in that endless line. Lo and behold, there it was. The (at the time) new Gourmet Magazine’s Quick Kitchen, a special edition chock full of Gourmet (aka totally delicious) style recipes that can be made in less than the typical Gourmet style (aka lengthy and laborious) time. It was like a gift from the heavens.

So click below for the chicken recipe. I know it by heart at this point, ’cause I make it almost once a week. And if you go to Gourmet’s site (which is all that is left of that venerable mag) you can order the Quick Kitchen special issue and get loads more ideas for ways to serve up deliciousness without breaking a sweat.

SWEET AND SOUR CHICKEN THIGHS WITH CARROTS

yield: Makes 4 to 6 main-course servings

active time: 30 min

total time: 1 1/4 hr


Ingredients:

  • 8 small chicken thighs with skin and bone (2 1/2 to 2 3/4 lb total), trimmed of excess fat
  • 2 teaspoons salt
  • 1 1/4 teaspoons paprika
  • 3/4 teaspoon cinnamon
  • 1/2 teaspoon black pepper
  • 1 1/2 tablespoons olive oil
  • 1 large onion, halved lengthwise, then cut lengthwise into1/4-inch-wide strips
  • 1 lb carrots (6 medium), cut diagonally into 1-inch pieces
  • 2 tablespoons minced garlic
  • 1/2 cup water
  • 1/4 cup fresh lemon juice
  • 2 tablespoons mild honey
  • 1 tablespoon finely chopped fresh flat-leaf parsley
  • 1 tablespoon finely chopped fresh cilantro

Preparation:

Pat chicken dry. Stir together 1 1/2 teaspoons salt with paprika, cinnamon, and pepper and rub onto chicken.

Heat oil in a 12-inch heavy skillet over moderately high heat until hot but not smoking, then brown chicken in 2 batches, turning over once, about 10 minutes per batch. Transfer chicken as browned to a plate.

Discard all but 3 tablespoons fat from skillet, then add onion and carrots. Sprinkle with remaining 1/2 teaspoon salt and pepper to taste and cook over moderate heat, stirring occasionally, until onion is softened and beginning to brown, 8 to 10 minutes. Add garlic and cook, stirring occasionally, 1 minute.

Return chicken, skin sides up, to skillet, nestling it into vegetables. Stir together water, lemon juice, and honey until blended and add to skillet, then cook over moderately low heat, covered, until chicken is cooked through and carrots are tender, 25 to 30 minutes. If necessary, skim fat from sauce, then add salt to taste. Sprinkle with herbs just before serving.

(photo by: Romulo Yanes)

Read More http://www.epicurious.com/recipes/food/views/Sweet-and-Sour-Chicken-Thighs-with-Carrots-231790#ixzz1Ql6Smt4n

Bring on the red velvet

I’m not a huge baker, but, not too long ago, I found myself in the position of having to make a pink cake with pink turtles on top for my daughter’s birthday. Which sent me in a panic to epicurious.com. Which supplied me with an incredible recipe for red velvet cake. A dash of red color added to the icing and voila! the rose-hued cake of my little girl’s dreams. That particular version was devoured before I had a chance to photograph it, alas, but no worries, the cake made a repeat performance at Thanksgiving dinner, this time in it’s more adult, white-frosted, berry-coverd glory. (see above)

So many people asked me for the recipe that I figured I may as well put it up here, should any of you people out there be in search of a festive cake. What with the holidays already upon us, I’m figuring there should be lots of opportunities for this little number.

Here’s the recipe for the cake. I went the traditional (aka lazy) route and used food coloring to create the sumptuous hue, but would love to hear from anybody who has a more natural way to turn white cake into red…

Happy baking!!

Oh and stay tuned for the annual Brooke Williams holiday gift guide… the next week plus promises to be filled with near daily entries chock full of ideas of things to get your loved ones or coworkers or in-laws for kwanza or hanukkah or christmas, or for that poor soul in your life that was born on December 28th…