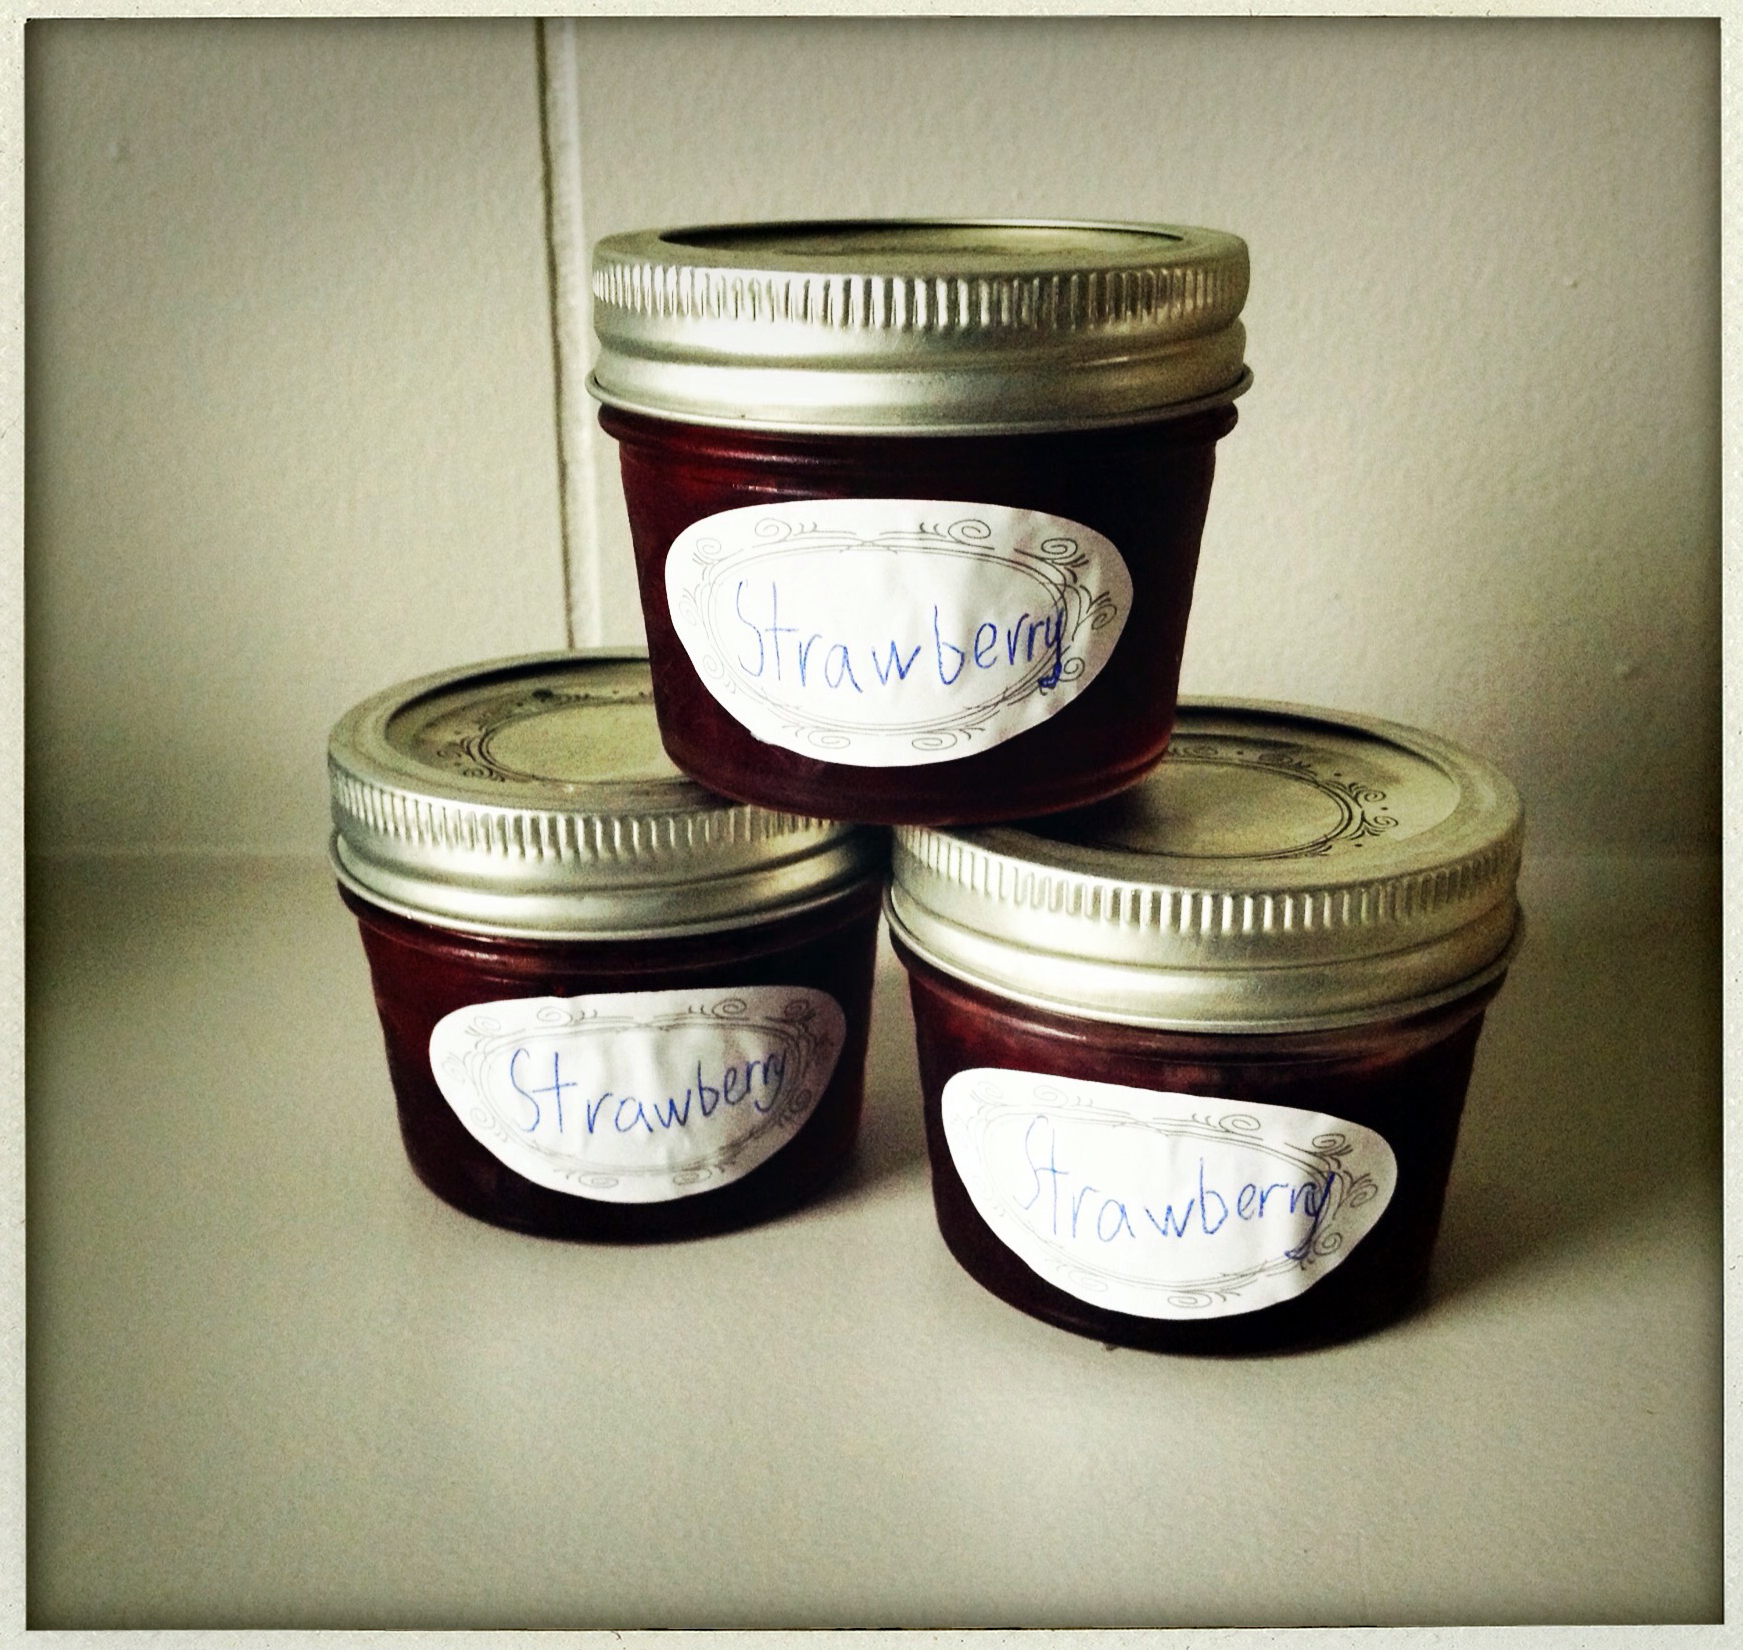
The fruits of our labor, carefully labeled and put into mini bell jars to be (mostly) given out as gifts.
Strawberry season is drawing to a close. TO A CLOSE!!! Not that you can’t eat these berries all year long, but the supermarket variety has nothing on the fresh-from-the-farm beauties that we have been enjoying for the past 2 months or so. Luckily, peaches and other stone fruits are taking center stage, so I don’t have to jump off of the cliff just yet.
But still– this is one instance when hoarding isn’t an altogether bad thing. And hoarding berries in the form of jam might actually be considered a virtue.
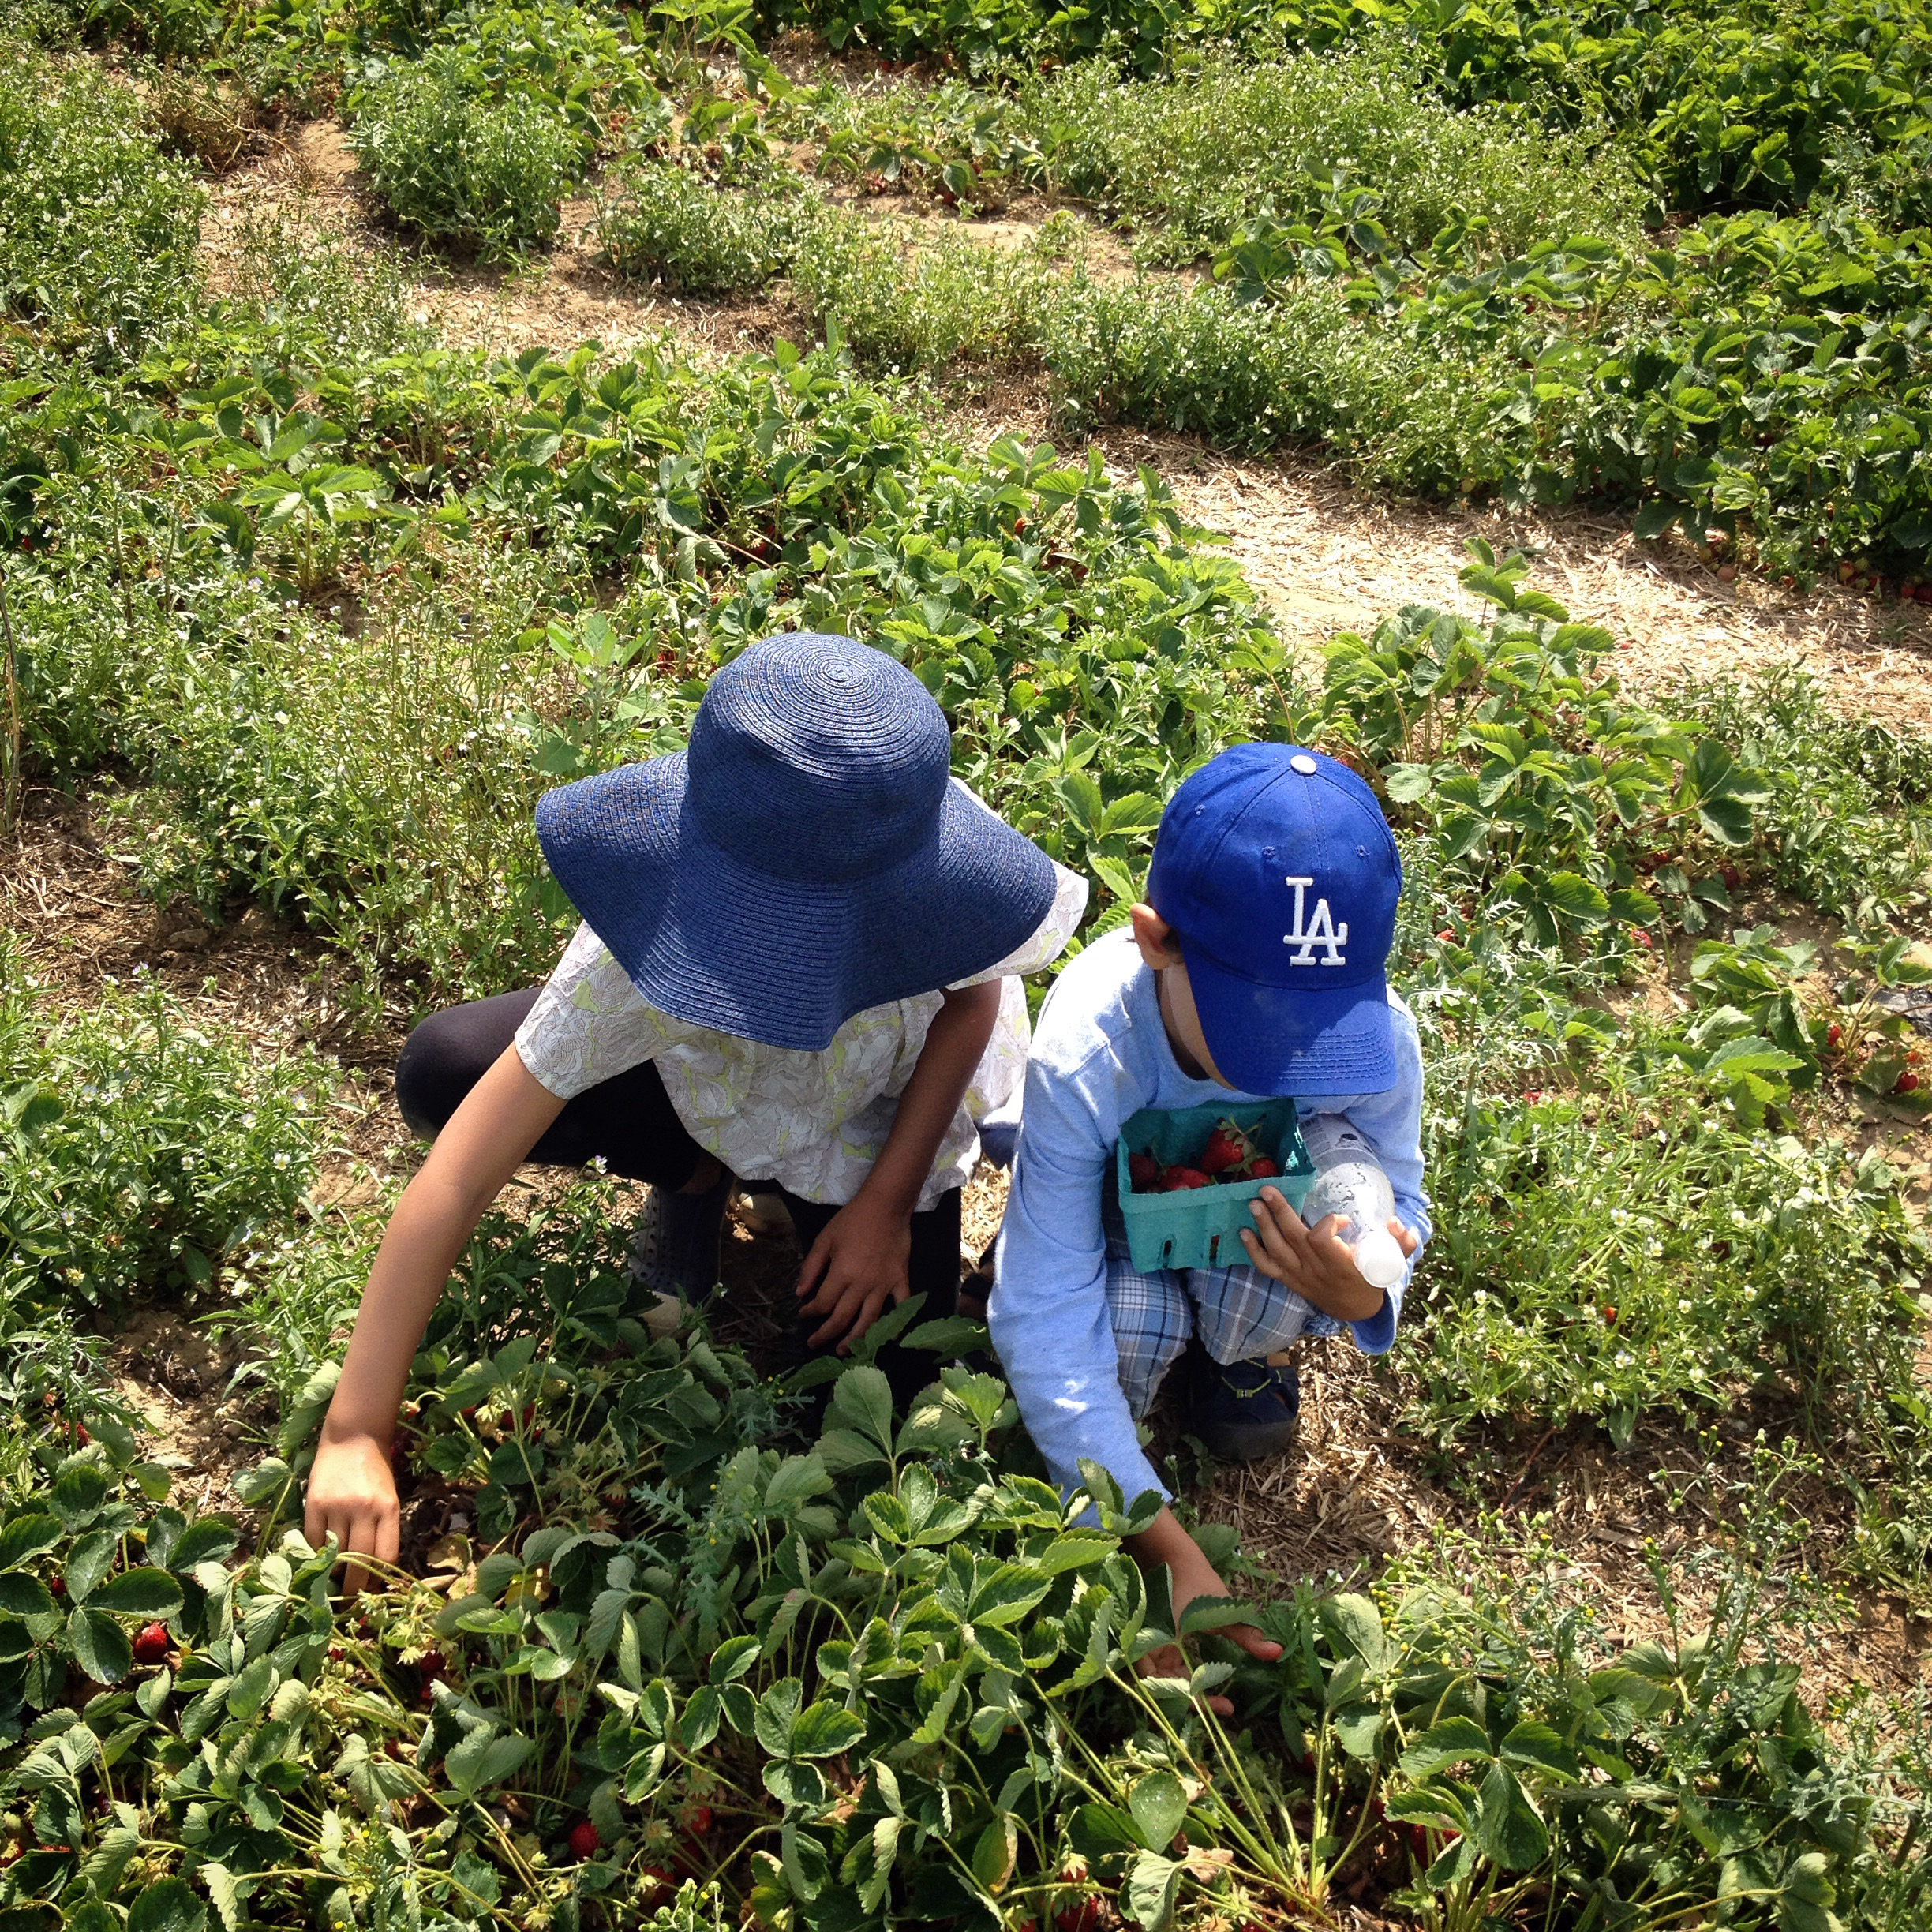
Whoever said that child labor is a bad thing clearly does not understand the advantage of the tiny hands when it comes to picking berries.
Step one is to gather as many strawberries as you can muster (here are my daughter and nephew gathering way more berries than a body could possibly eat in one… or three.. sittings.)
Then you basically wash them, cut off the stems (and cut them in half if they are particularity large), throw them in a pot with the warm sugar/lemon juice/lemon zest combo you’ve mixed up, and then simmer till the berries break up and the whole mixture thickens into a jam-like substance that gels when you pour a bit of it onto a very cold plate.
And voila, fresh strawberry jam… perfect for hostess gifts, or teacher gifts, or gifts to your grandparents, or just a gift to your own stomach. We couldn’t be bothered to actually can the stuff to make bonified preserves, but our version will last a few weeks in the fridge, which is far longer than you’ll need as it tends to be eaten in a flash. Perhaps next year we’ll go all Little House On The Prairie and try canning for real.
Click below for the full recipe, or get it straight from the source (we followed Ina Garten’s version…)
Here are The Barefoot Contessa’s instructions verbatim… The lemon juice and zest contain pectin, which is vital for the thickening of the jam, so don’t skimp. We also found that it took maybe three times as long as indicated for the juices to gel on the plate, but it does happen, so don’t give up! There are also loads of tips/instructions on how to actually can the stuff, should you be so inclined.
FRESH STRAWBERRY JAM
Ingredients
2 cups sugar
1 large lemon, zested and juiced
1 1/2 pints fresh strawberries, hulled and halved
How to make it
Combine the sugar, lemon zest, and lemon juice in a small saucepan and cook over very low heat for 10 minutes, until the sugar is dissolved. Add the strawberries and continue to cook over very low heat for 20 minutes, until the strawberries release some of their juices and the mixture boils slowly. Cook until a small amount of the juice gels on a very cold plate. (I keep one in the freezer.) Pour carefully into 2 pint canning jars and either seal or keep refrigerated. Use immediately, or follow proper canning guidelines below.
Sterilizing Tips:
Jars should be made from glass and free of any chips or cracks. Preserving or canning jars are topped with a glass, plastic, or metal lid, which has a rubber seal. Two piece lids are best for canning, as they vacuum seal when processed.
To sterilize jars, before filling with jams, pickles, or preserves, wash jars and lids with hot, soapy water. Rinse well and arrange jars and lids open sides up, without touching, on a tray. Leave in a preheated 175 degree F oven for 25 minutes. Or, boil the jars and lids in a large saucepan, covered with water, for 15 minutes.
Use tongs when handling the hot sterilized jars, to move them from either boiling water or the oven. Be sure the tongs are sterilized too, by dipping the ends in boiling water for a few minutes.
As a rule, hot preserves go into hot jars and cold preserves go into cold jars. All items used in the process of making jams, jellies, and preserves must be clean. This includes any towels used, and especially your hands.
After the jars are sterilized, you can preserve the food. It is important to follow any canning and processing instructions included in the recipe and refer to USDA guidelines about the sterilization of canned products.
About Sterilizing Jars:
Properly handled sterilized equipment will keep canned foods in good condition for years. Sterilizing jars is the first step of preserving foods.
Tips:
Jars should be made from glass and free of any chips or cracks. Preserving or canning jars are topped with a glass, plastic or metal lid, which has a rubber seal. Two-piece lids are best for canning, as they vacuum-seal when processed.
To sterilize jars before filling with jams, pickles or preserves, wash jars and lids with hot, soapy water. Rinse well and arrange jars and lids open sides up, without touching, on a tray. Boil the jars and lids in a large saucepan, covered with water, for 15 minutes.
Use tongs when handling hot sterilized jars, to move them from boiling water. Be sure tongs are sterilized too, by dipping the ends in boiling water for a few minutes.
As a rule, hot preserves go into hot jars and cold preserves go into cold jars. All items used in the process of making jams, jellies and preserves must be clean. This includes any towels used, and especially your hands.
After the jars are sterilized, you can preserve the food. It is important to follow any canning and processing instructions included in the recipe and refer to USDA guidelines about the sterilization of canned products.
Read more at: http://www.foodnetwork.com/recipes/ina-garten/fresh-strawberry-jam-recipe.html?oc=linkback
Love this idea–thanks for instructions on just how to do it. Also cutest picture of the wee ones, reminds me of doing the same thing as a kid off Rte 27.